MS Teams Admin - Run .msi Files As Administrator
How to run .msi files as administrator
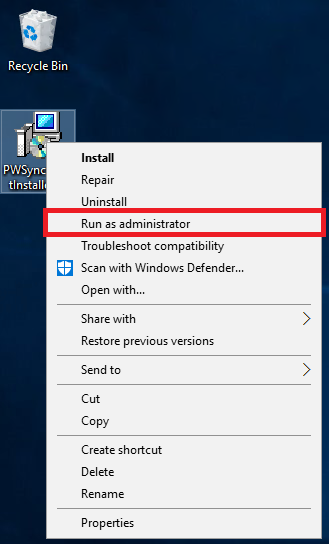
Starting in Windows Server 2012 the "Run as administrator" option no longer appears when right clicking a .msi file. This may be a required step when installing certain applications onto your Windows Server. Below are some options to be able to run a .msi file as an administrator.
First Option
As a single use solution, you can run the .msi as an administrator from the Windows command prompt.
- Open elevated Command Prompt. To do so, type "CMD" in Start menu or Start screen search box, and then simultaneously press Ctrl+Shift+Enter keys.
- Alternatively you can also right click the Start icon in the bottom left corner and select "Command Prompt (Admin)"
- Click Yes button when you see the UAC prompt.
-
In the Command Prompt, navigate to the directory that the install file is located in and run the install file.
Second Option
As a more long term solution you can modify the registry to add the "Run as administrator" option back when right clicking on a .msi file. If you would like to bypass manually editing the registry and simply run a ready-to-use registry file, click here. Please note, that if you are not experienced in editing Windows registry I highly recommend using only option 1 above.
- Open Registry Editor
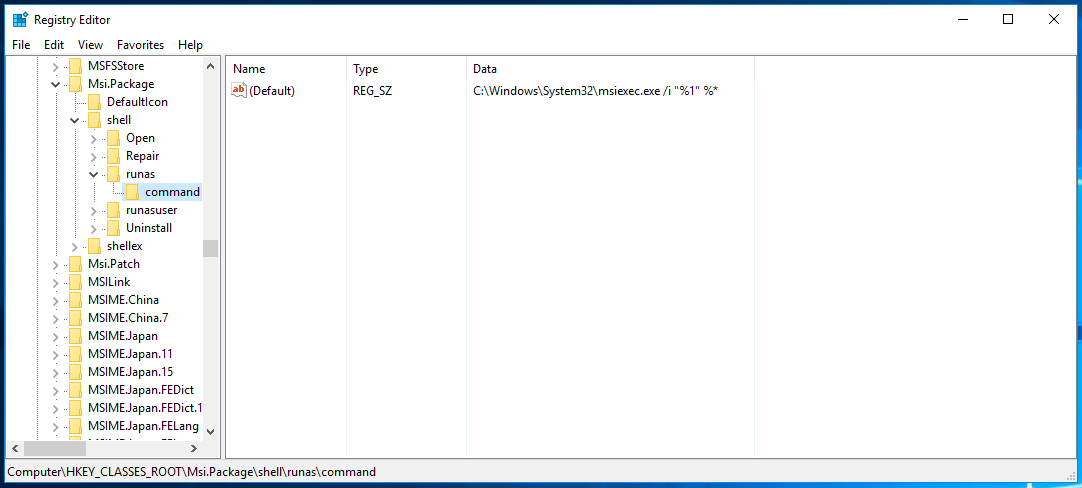
- Go to the following Registry key: "HKEY_CLASSES_ROOT\Msi.Package\shell"
-
If you have no such Registry key, then just create it.
-
-
Create here a new subkey named "runas". You will get "HKEY_CLASSES_ROOT\Msi.Package\shell\runas"
-
Under the runas subkey, create a new subkey called "command"
-
Set the default parameter of the command subkey to the following text: "C:\Windows\System32\msiexec.exe /a \"%1\" %*"
-
Your registry should now look like the image below:
-

-
-
You can now test and right click on any .msi file and you should see the option to "Run as administrator".
-

