Clarity Connect Federation - Creating Azure AD
Clarity federated customers can use Azure AD for their authentication. In this scenario an admin account needs to be provided so that our hosted support team can access the instance in case of emergency. The steps below outline how this user account needs to be created.
1. Open Office365 Admin Center
2. On the left side of the Admin Center, select the “Users” drop down menu
3. Select the option for “Active users”
4. From the “Active users” page, choose the option to “+ Add a user”
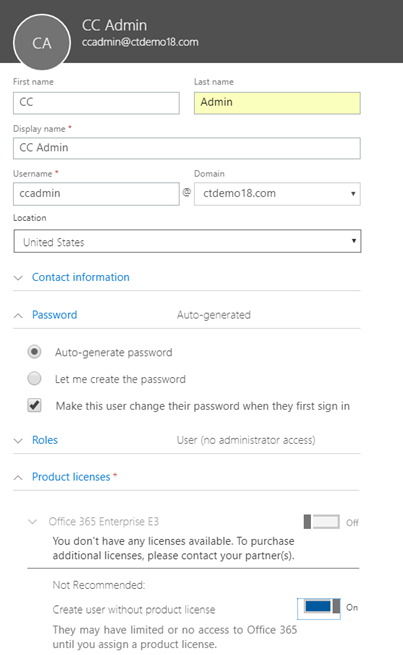
5. Fill out the new user template using the information below
· First name: CC
· Last name: Admin
· Display name: CC Admin
· Username: ccadmin@[your domain] (i.e. ccadmin@example.com)
· Password: Select the option to “Auto-generate password”. Also make sure the option is selected to “Make this user change their password when they first sign in”.
· Roles: You can leave this account as a “User (no administrator access)”
· Product licenses: Select the option to “Create user without product license”

6. Once the template is complete, select the option to “Add” to finish adding the user.
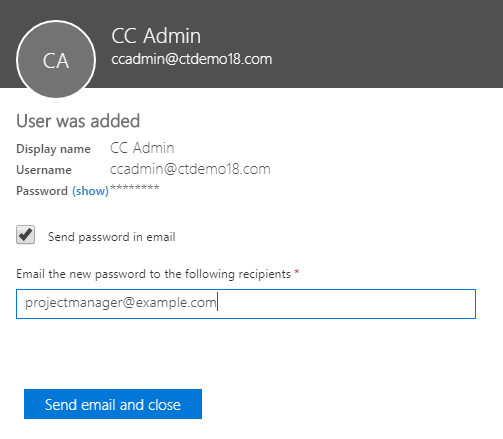
7. You will now see a page confirming the user was successfully added. There will be a checkbox to “Send password in email”. Make sure this option is selected and, in the box, below, enter the email address of the project manager or support representative that you are working with.

8. Follow the steps found here to set this user’s password to never expire.
