Cisco Voice - Verify a Partition
Overview
This article will provide instructions on how to verify a Partition in Call Manager for a customers location.
NOTE: You will need to be connected to the VPN to complete these instructions.
Instructions
Step 1. Log into the appropriate Call Manager Cluster.
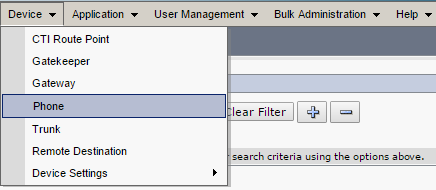
Step 2. Highlight "Device" and select "Phones" from the Dropdown menu.

Step 3. Search for the Directory Number or Device Name as available and click "find."

or

Step 4. Either search will populate the device information. Make note of the information listed under "Device Pool."

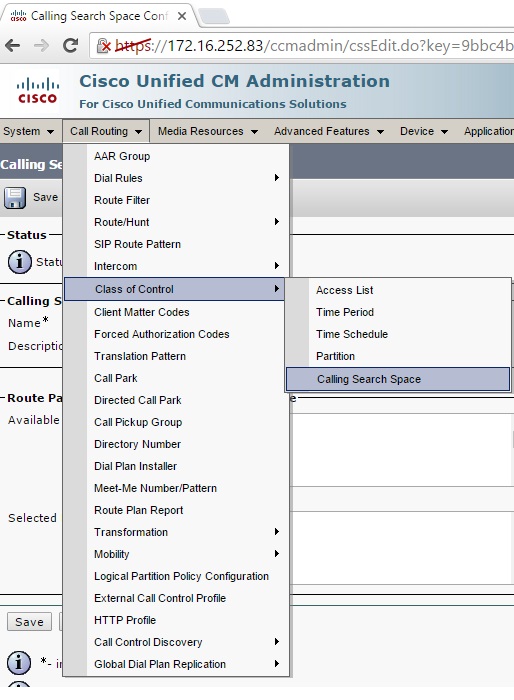
Step 5. With the Device Pool information select “Call Routing.” From the dropdown select “Class of Control” and then “Calling Search Space.” Once here you will need to have the partition name. You can find this by searching the DN and taking note of the output under “Partition”.

Step 6. Enter the saved Device Pool information into the search field and click "Find."

Step 7. This will pull up a list of matching results. Select the matching CSS Name.

When you’ve found the partition you’re looking for then you will want to verify that it has all partitions listed. These will need to be in the correct order as listed below.
PSTN-CT-911-8 – Will give the option to dial out to emergency services.
Calltower – Allows internal call routing
PSTN-CT-AC801-8 – Allows dial out local calls.
E164 - Dialing - Allows Dialing in E164 format
PSTN-CT-National-8 – Allows dial out National calls
PSTN-CT-International-8 – Allows dial out for international calls.
NOTE: The last digit in these partitions (either 8 or 9) will be the dial out prefix for the customer. This information can be found in the Admin Portal under Corporate Administration > Voicecube Settings > Dial Out Prefix.
