CT Text for Webex- Adding Users
Adding Users
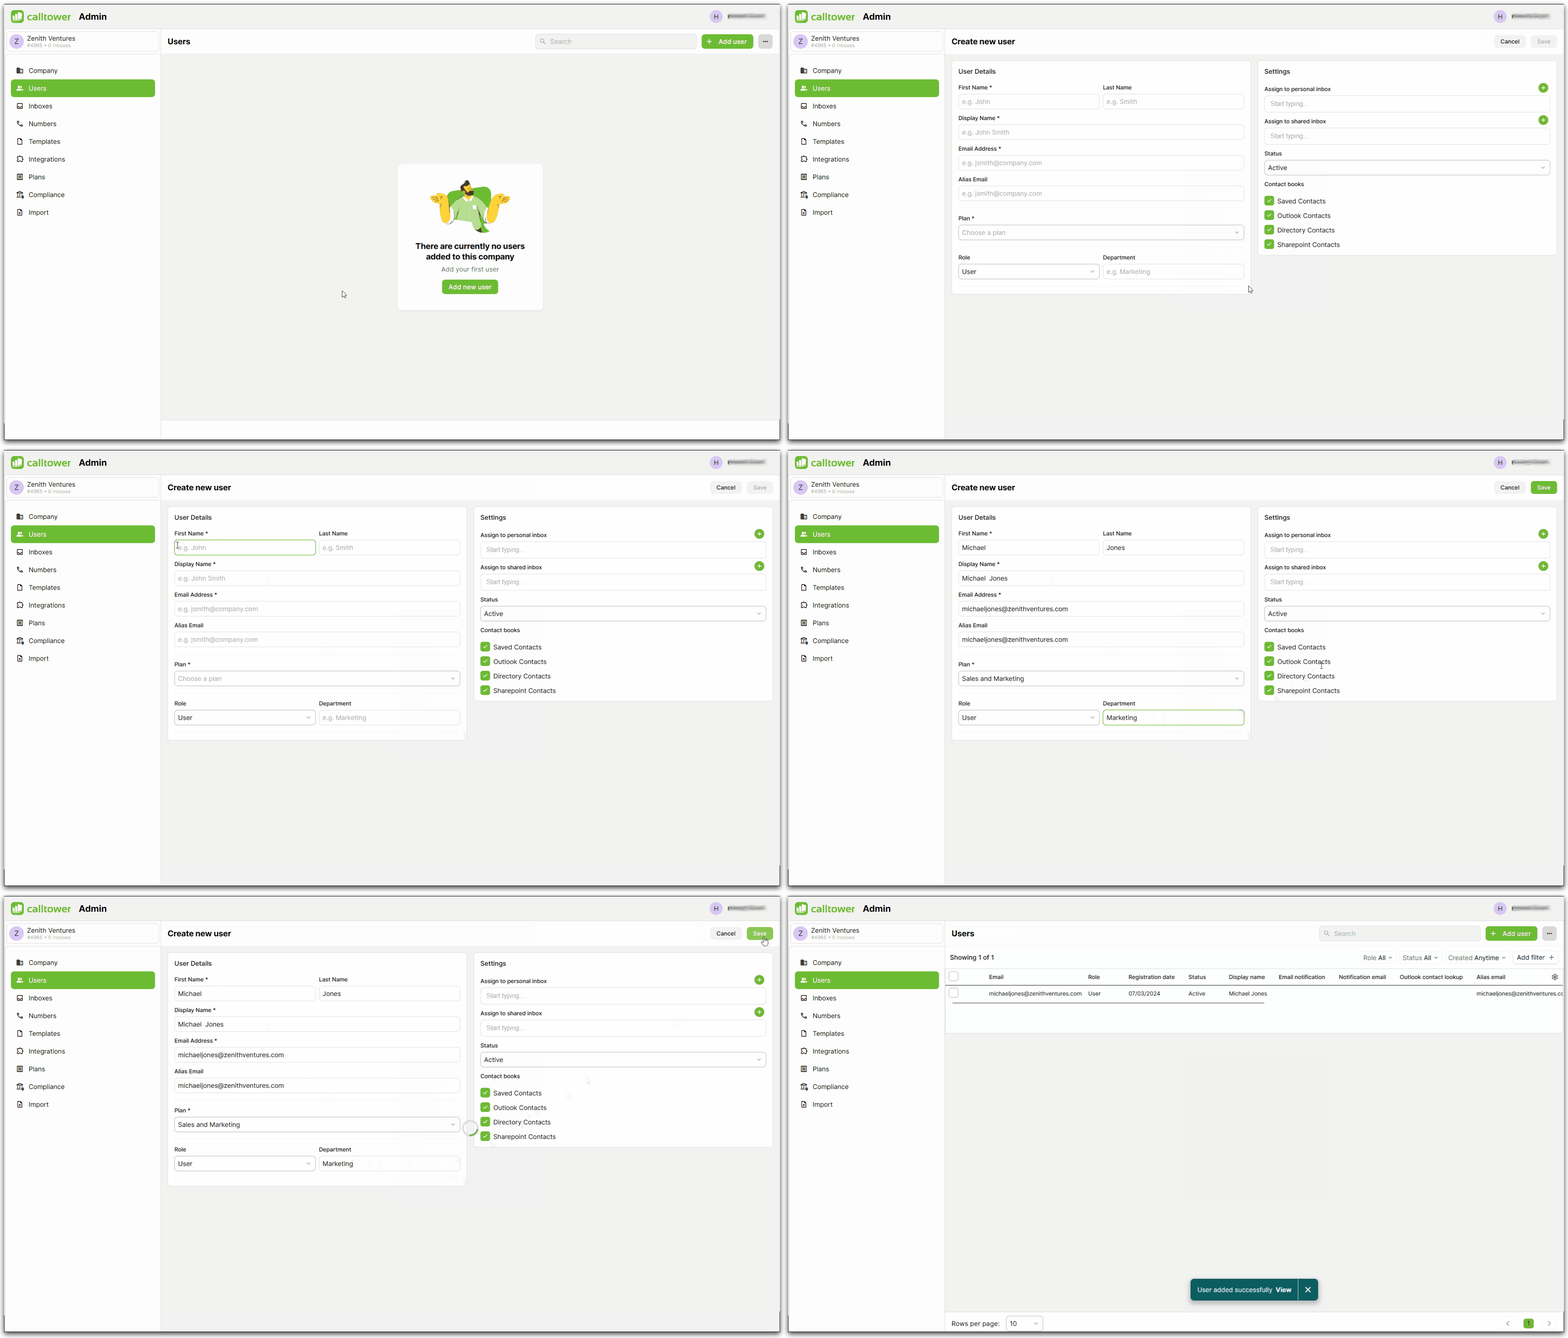
To add a new user to your company, click the Add New User button on the Users tab. This will bring up the form to complete to add a new user. The mandatory fields are:
- First name
- Display name
- Email address
However, ther are other options to select.
- Email notifications when turned on will provide this user with notifications via their email address or another email address of your choice.
- Role allows you to decide if this user is a user or admin. Admin will be able to access the admin portal and make changes to users and inboxes.
- User status allows you to change a user from Active (able to user CT Text immediately) or Disabled (unable to access CT Text).
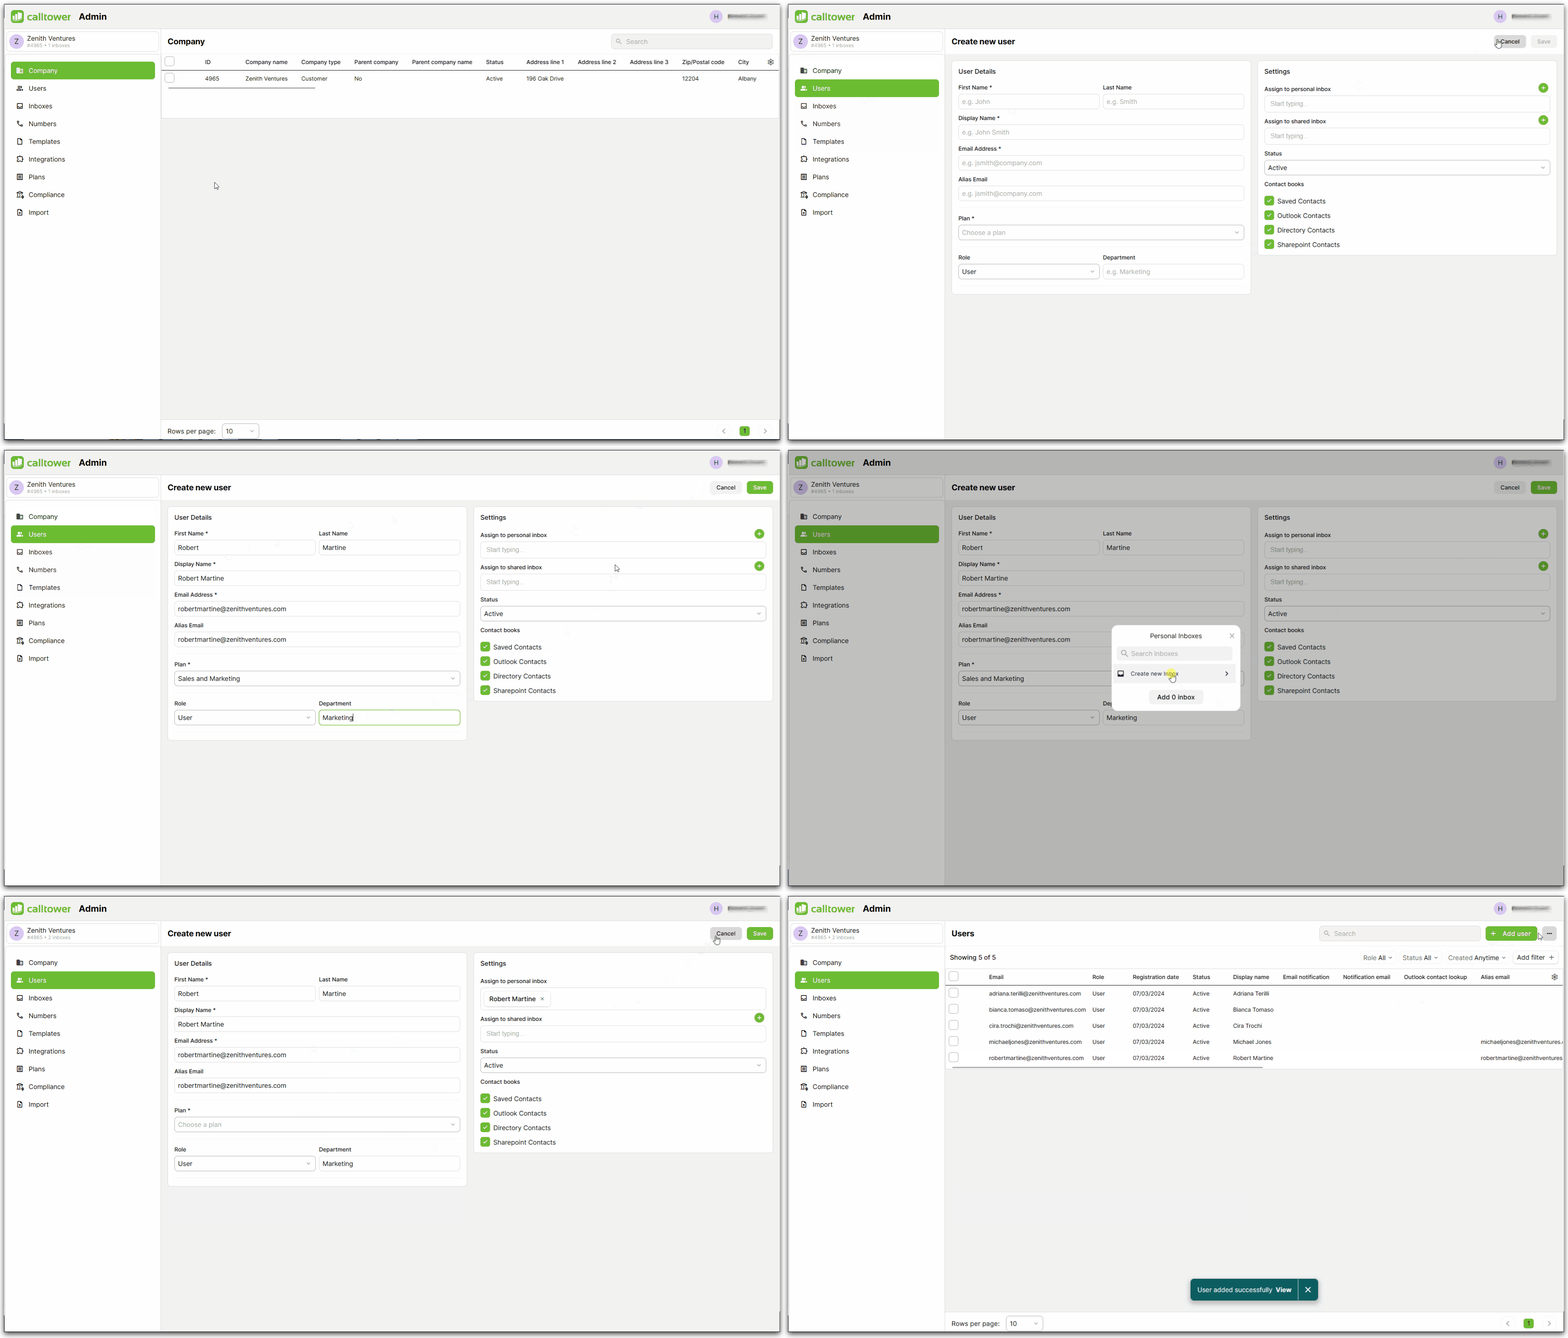
- Inboxes allows you to assign the user to a personal or shared inbox, or create a new inbox to add the user to.

Importing Users
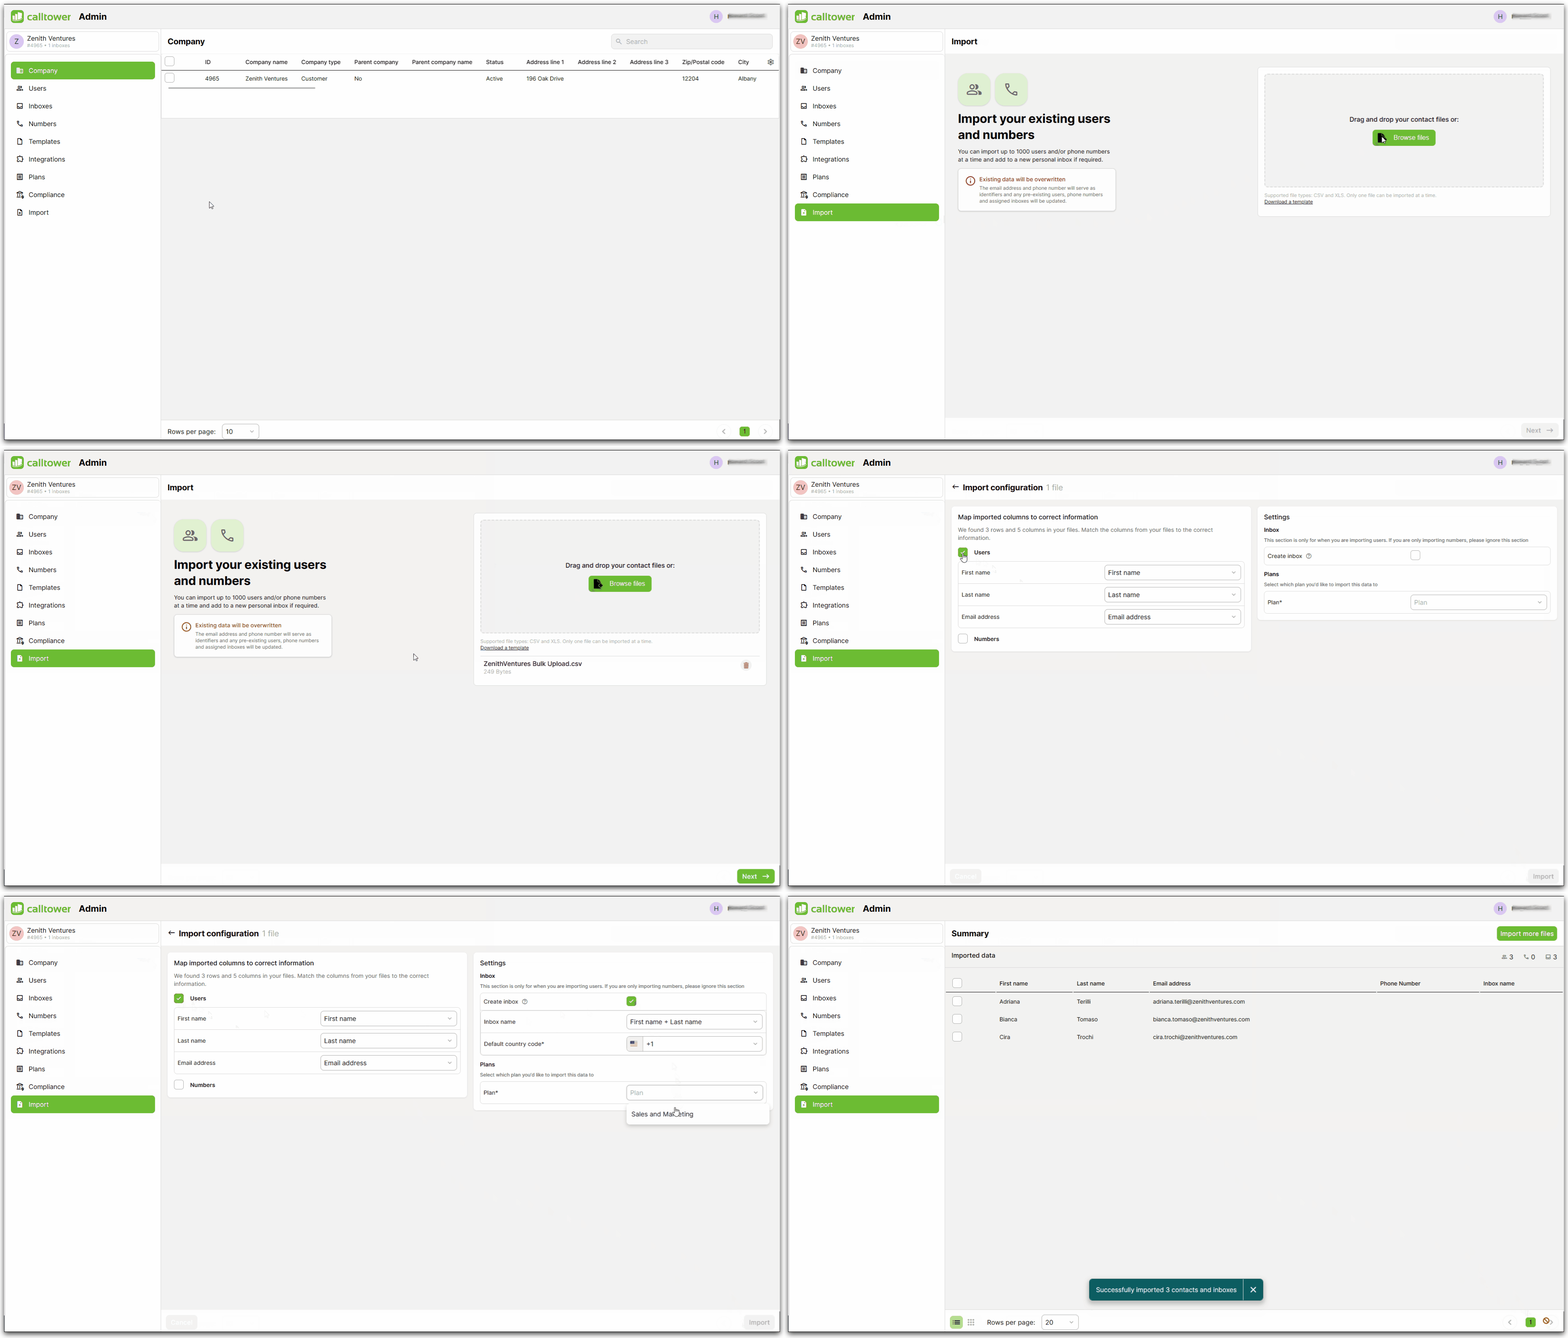
To add a large number of users, the import function can be used. To import users you can create a .CSV or .XLS file, making sure that you have the mandatory fields and any other fields you want completed as rows. Alternatively, you can use the template which is provided on the import page. Once you are ready to import your file, click Import Users on the Users tab of your company.

Create a .CSV or .XLS File

Adding an Inbox While Adding a User
When adding a user, there is the option to add the user to an inbox. If the type of inbox needed has not been added, this can be done while adding the new user. To add an inbox, in the user form select the + button next to the type of inbox you would like to create. This will take you to the inbox form to create the new inbox, which will be assigned to your new user when you save the inbox.

